
Crochet enthusiasts, especially beginners, often find themselves intrigued by the magic ring (also called a magic circle). This essential technique creates a tight, adjustable center, making it perfect for amigurumi, granny squares, and other circular crochet projects. If you're struggling with holes in the center of your projects, the magic ring is the solution you need!
What is a Magic Ring in Crochet?
A magic ring is a method for starting crochet in the round with an adjustable loop. Unlike traditional chain starts, which leave a visible hole in the middle, the magic ring allows you to pull the loop tight, eliminating any gaps.
Why Use a Magic Ring?
No center hole: Ideal for amigurumi, coasters, and hats.
Professional finish: Gives projects a polished look.
Adjustable size: Ensures the perfect fit for your pattern.
Stronger foundation: Creates a firm starting point for stitches.
How to Make a Magic Ring (Step-by-Step Tutorial)
Materials Needed:
Yarn of your choice
Crochet hook suitable for the yarn weight
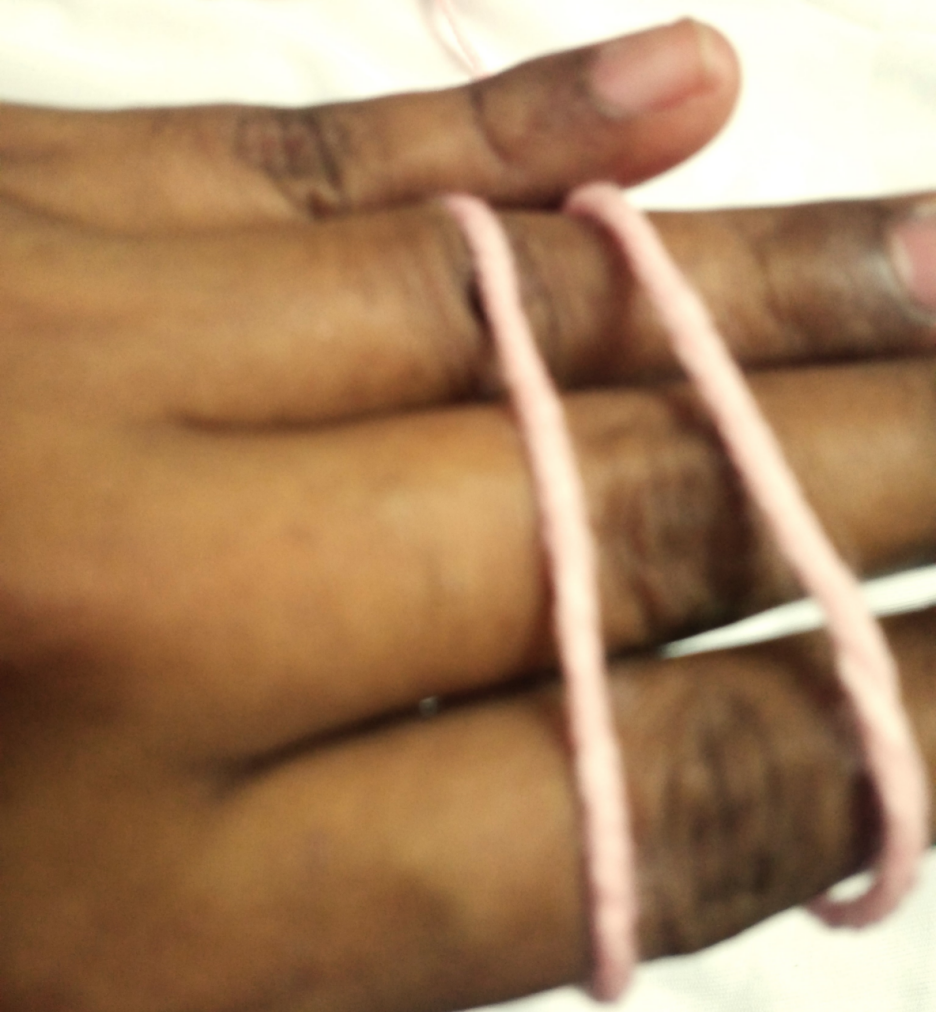
Step 1: Wrap the Yarn
Wrap the yarn as shown in the picture.

Step 2: Form an ‘X’
Cross the yarn over the tail end to create an "X" as shown.

Step 3: Turn Over
The other side will look like this.
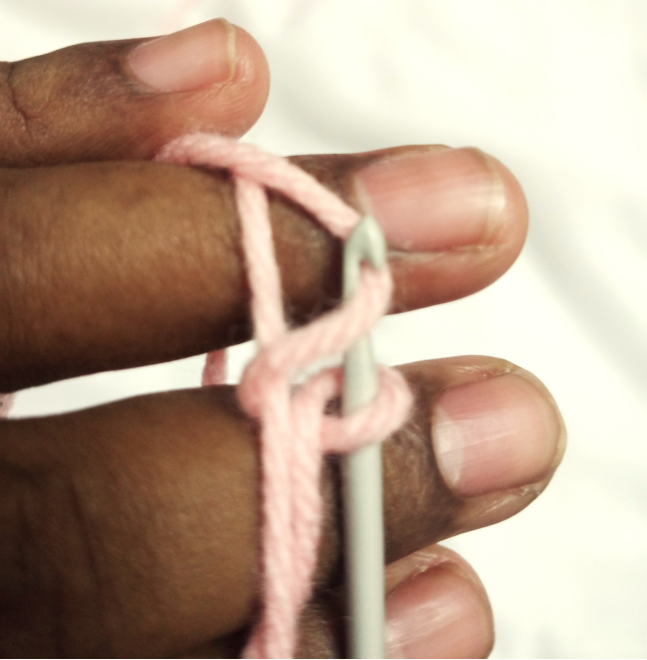
Step 4: Insert the Hook
Insert your crochet hook under the first strand of yarn and grab the second strand with the hook. Pull it under the first strand, creating a loop on your hook.


Step 5: Twist
Twist the hook(yarn) as shown in the picture.

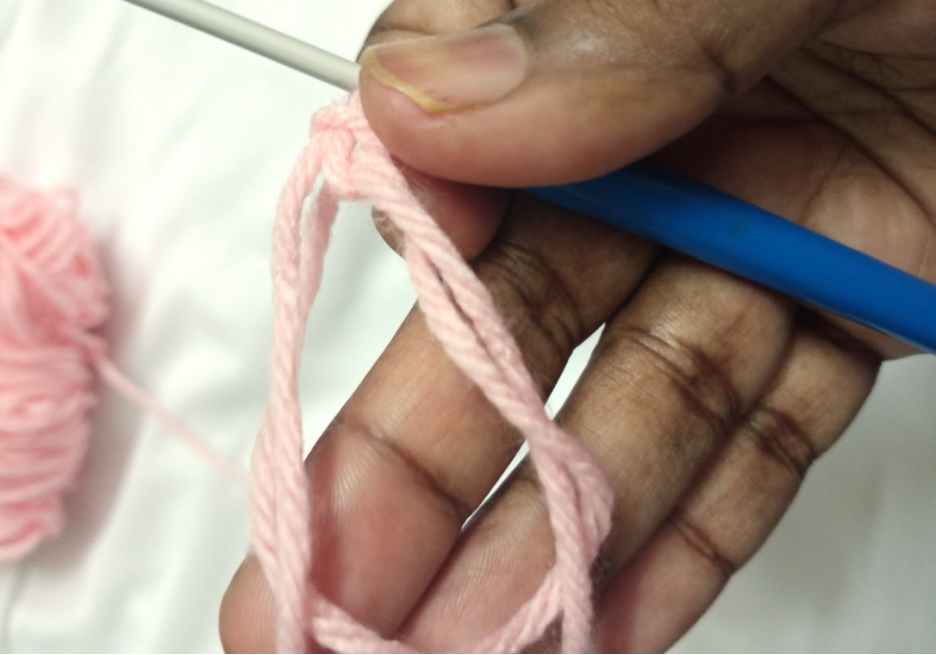
Step 6: Chain Stitch
Chain one to secure the loop by grabbing the yarn as shown and bringing it through the loop. Now the magic ring is formed.


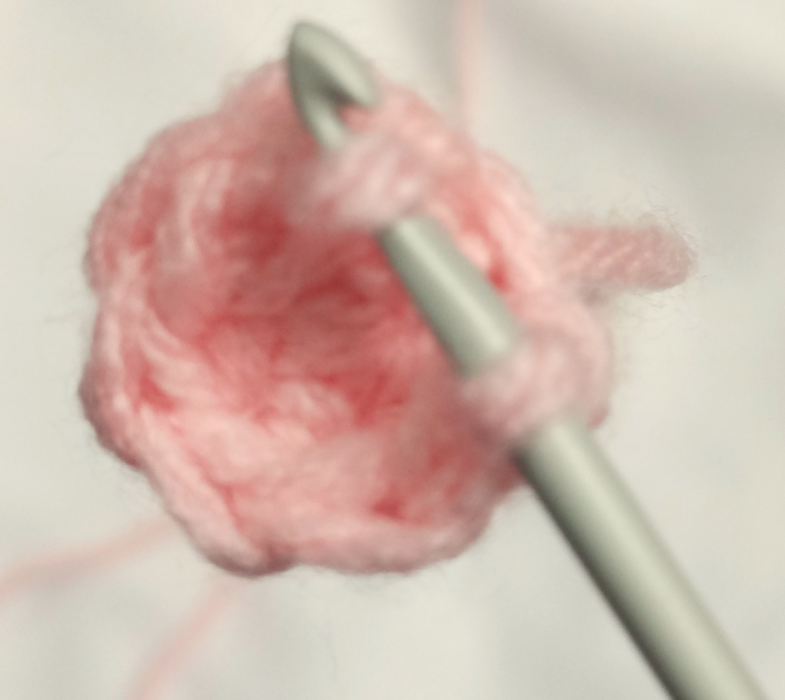
Step 7: Work Stitches
Work the required number of stitches (such as single crochet, double crochet, etc.) into the ring. For example, if your pattern calls for six single/ double crochet stitches, make the stitches into the ring stitches. Repeat this process until you have the desired number of stitches.


Step 6: Tighten the Ring
Hold the base of the stitches with your non-hook hand and gently pull the tail end of the yarn to tighten the ring. This will close the hole in the center of your work.

Slip stitch with the first stitch as shown.


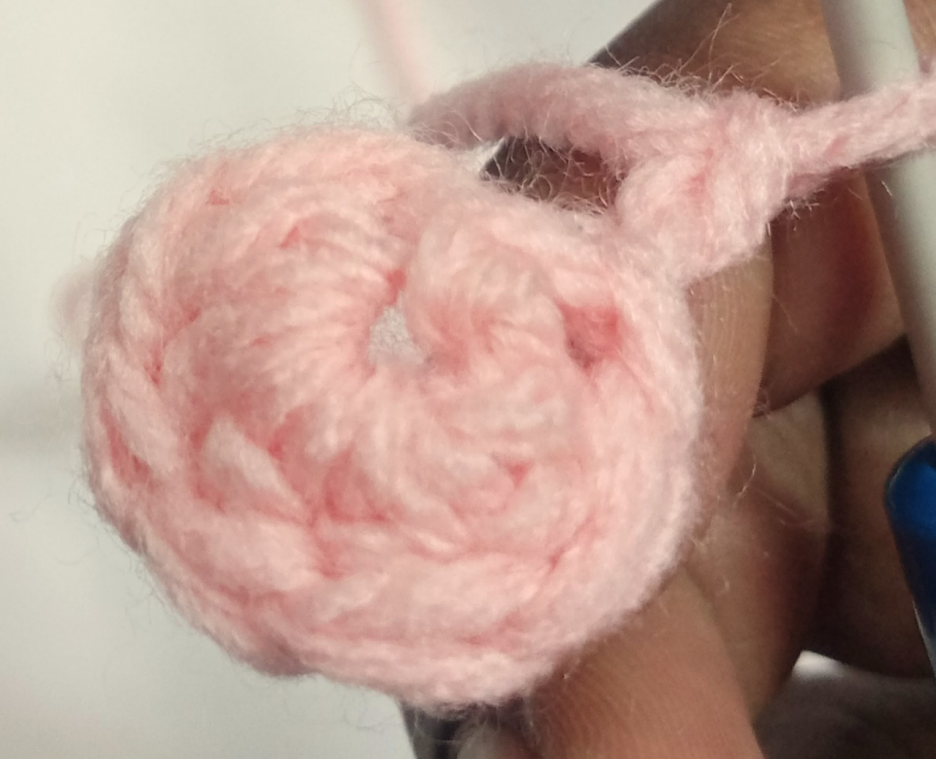
Step 7: Continue Working in the Round
Once the magic ring is tightened, continue working the next round of stitches into the stitches of the previous round.
And there you have it, a magic ring in crochet! Practice this technique a few times, and you'll get the hang of it. It's a great way to start projects that require a closed center, giving your work a neat and professional look.
Common Mistakes and How to Fix Them
Ring doesn’t tighten: Ensure you are crocheting over both strands of the loop.
Loop comes undone: Make a slip stitch after the first round for extra security.
Too tight to work into: Keep the tension loose while making initial stitches.
Alternative to Magic Ring
If you find the magic ring tricky, you can start with chain 4, slip stitch to form a ring, and crochet into the center. However, this may leave a small hole.
Projects That Use Magic Rings
Amigurumi animals and toys
Crochet coasters
Circular motifs for blankets
Hats and berets
Mastering the magic ring in crochet is a game-changer! It may take a few tries, but once you get the hang of it, you’ll never go back to chain starts. Keep practicing, and soon you'll be creating stunning, seamless projects with confidence.
Boost Your Crochet Skills!
Bookmark this guide for future reference.
Subscribe to my blog for beginner-friendly tutorials, patterns, and crochet hacks.
Want More Crochet Tips?
Subscribe to my blog for beginner-friendly tutorials, patterns, and crochet hacks. Happy crocheting!
Comments